Sunday, December 30, 2018

2018: Making Pear and Apple Cider

Last year we used a pedal-powered grape crusher to process fruit before pressing juice out but the coarse pulp did not release all the liquid. A few YouTube videos demonstrated how well an under sink garbage disposal unit pulverizes fruit and documented that over 85% of the liquid can be readily drained from the apple sauce consistency pulp. We purchased a 3/4 horsepower all stainless steel unit for under $100 and will use it exclusively for making cider. It makes the process much faster and 15 or 20 gallons can be readily done in an afternoon by one or two people.


The Gray Box Holds the Garbage Disposal Unit and Fruit, Pushed Through the Bowl, Comes Out as Applesauce into the Bowl on the Ground

View Showing the Hole in the Bowl Bottom
The Outdoor Cider Making Setup Showing Fruit Washing Station to the Press 
Filling the First Layer of Apple Pulp in the Press
Pressing the Five Layers of Pulp So the Juice Fills the White Tray and Out through a Hole and into the Blue Funnel and 5-Gallon Glass Carboy Below
Second Layer of Pulp Being Loaded into the Press with a Chicken Waiting for "Apple Cardboard", the Almost Dry Product Layers from the Press
Another Day with the Fifth Layer of Pear Pulp Being Loaded into the Press
The Umbrella Shields the Pulping Operation from the Sun
Another View of the Pressing Operation: Various Blocks Are Used to Extend the Stroke of the Hydraulic Press
Pear Crushing Operation with Chickens Gleaning Seeds Dropped
Four Carboys of Pear Cider for Fermenting with an Additional Pot for Fresh Juice


Fruit "Cardboard" Unwrapped from its Filter Cloth

Fruit Pulp "Cardboard"
Applesauce Consistency Pulp Is Contained in Fabric to Filter the Juice into the Tray Below. This Fabric Proved too Weak to Withstand the Pressure.


Saturday, December 29, 2018

Making Salad Tongs

A friend has a set of salad tongs that are simple, never get separated and use very little wood. The two piece hinged wood pieces fold flat or open into a tweezer-style salad grabber that easily picks up lettuce. It's difficult, though, to pick up tomatoes, carrots, olives and other more solid items that tend to pop out.
Bottom: Original Design; Top: Maple Blanks
First Set of Tongs Out of Cherry with Scoops Carved at the Ends
Each half of the tongs is split into three parts and are hinged together with a slender brass rod through the outer parts of one side through the center part of the other. The features that spring the salad tongs open are the two warped outer slivers on the left in the photo above and the warped center part on the right. 

Four Halves of the Salad Tongs Fit in a Half Gallon Mason Jar: A Wood Sliver Is Inserted Between Each of the Three Parts And Boiling Water Poured to the Top to  Warp Them. After an Hour they are Dried Using the Microwave.
Another method to warp the springy parts also works: boiling them in a pan on the wood stove but it takes much longer to dry them than the ones done in a mason jar.

A Batch of Salad Tong Halves in a Pan Showing the Wood Slivers that Warp the Three Ends
The first batch of salad tongs I made using cherry and milled blocks to make "bowls" for the ends. These functioned okay but required more work than the second set of ten that I made out of maple. Salad tongs don't really need bowls to pick up stuff when shallower scoops also work. Simply adding short pieces of wood with the grain running across the tong handles function well. One inch holes down a similar piece of maple made five pair of scoop ends after sawing them apart.
Layout of the Scoop End

The Scoop Pieces Are Glued on the End of the Tongs After the Hinge Pin Is Inserted to Insure Proper Alignment for Gluing, Forming and Finishing

This Figure Shows the Different Stages From Blanks to Finished Salad Tongs

A Back Saw Was Used to Split Each Half into Three Parts

A Small Camping Saw Was Used to Complete the Cut
Ten Completed Salad Tongs: Maple and Cherry

One daughter requested that her set have a hole for hanging them so I added that feature to the maple set.
A Photo that Shows Different Amounts of "Springiness" Between the Handles

By the End: Once the Patterns Are Made, It Takes About Two Hours to Make a Set, Including Three Coats of Tung Oil

Sunday, September 30, 2018

Adding a Roof to a Shipping Container

We have been storing supplies from our solar manufacturing operation in shipping containers left over from a cancelled contract. Over thirty years one of their flat tops deteriorated and leaked badly and needed a properly pitched roof. 

View of the side of the shipping container before starting construction

View inside the container with the righthand door open

View showing warped longitudinal upper corner beneath the straight aluminum support member
The upper 20 foot long corner members were no longer strong enough to support a roof with snow loads so two aluminum 3x4 inch "I" beams were fastened above them to the substantial cast steel corners that were used to pick up the container.
The two longitudinal members that support the roof trusses: Each has 11 pairs of 2x2x1/8 inch aluminum angles to sandwich each truss
Four 1/2 inch thick plates each tapped for four 3/8 x 2.5 inch bolts that together capture the corners of the shipping container
Eleven simple trusses were fabricated using 2x4's for rafters and a 2x6 by 8 feet for the horizontal member. The pitch is 45 degrees so that the metal roofing readily sheds snow and the south facing side can one day support photovoltaic panels.
Eleven trusses each with three pairs of 1/2 inch plywood gussets, glued and screwed to the members
On each side, five 2x4 horizontal purlins were screwed to the trusses to support the seven sheets of corrugated steel 38x80 inch 29 gauge roofing.
North side of roofing complete, with two sheets on the south side: The ridge cap was fastened as each sheet was installed so no ladders were needed
Roof complete
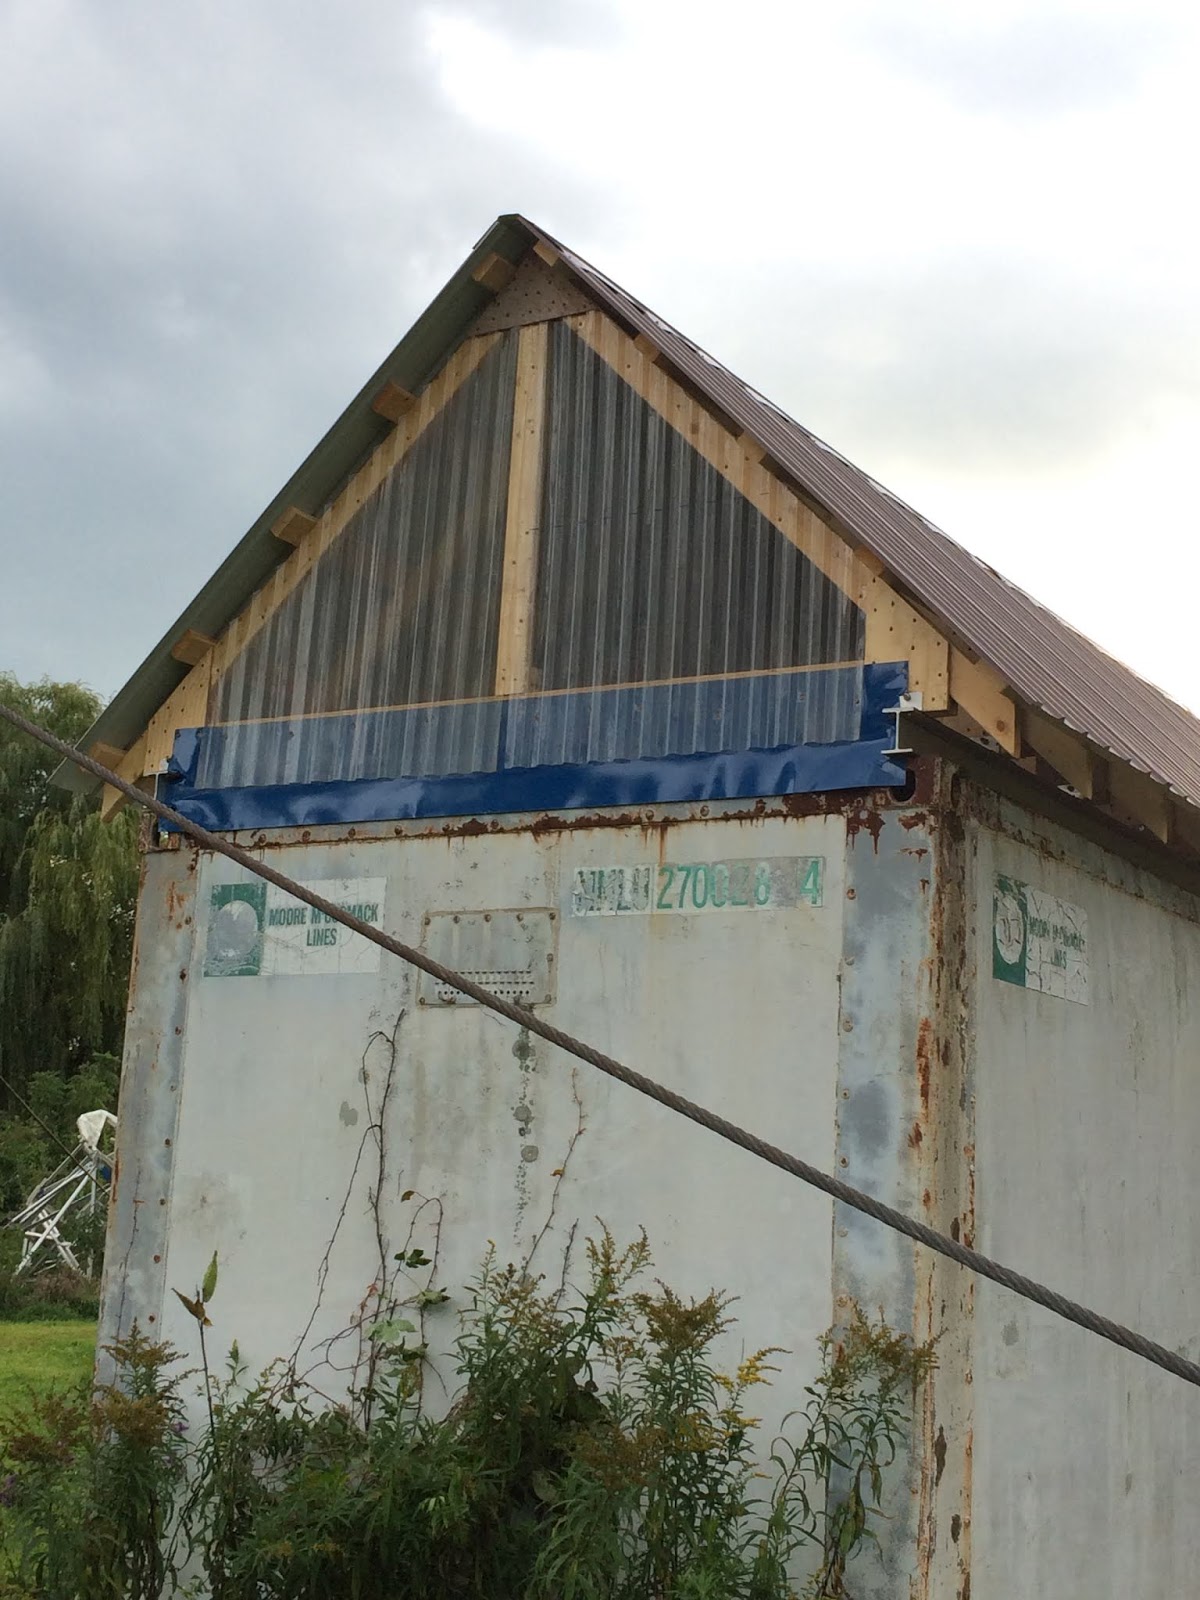
The triangular open ends were then protected with corrugated clear polycarbonate roofing to keep out the weather but let in light.
View showing end triangle covered with corrugated polycarbonate roofing with center vertical 2x4 added for support and blue aluminum flashing to cover the gap between the truss and short end of the container
 Waiting for delivery of supplies took longer than the six days it took to put it all together. Maybe next summer we'll paint the container barn red like of other outbuildings.

Saturday, June 30, 2018

Expanding Mushroom Production

It's been awhile since I've made a blog entry: nothing much new to write about - I've harvested the same crops, split and put away the same size wood for burning in our stove and cared for critters through the long winter, bubbling the pond to keep fish alive. Maple sugaring went the same as other years.

Gathering wood, though, this year was different: a pinched nerve in my leg prevents me from carrying logs out of the woods so we got a delivery of logs, eight cords worth. It's been more than a decade since I've had to order logs so I wasn't prepared for the volume of chainsaw shavings in one place!
Log delivery
The largest logs are four feet in diameter!

Working through the pile reduced about 3% to chainsaw chips.

What to do with up to 4 inches of chips? Mulch? Or Something else?

To fit 8 cords into the space reserved for it, firewood had to be stacked higher than ever: to 16 feet and touching the roof!
I started using the chainsaw chips to mulch garlic but received an ad from our mushroom spawn supplier that Wine Cap mushrooms grow well in wood chips. I ordered two 5.5 pound packages of 
spawn in sawdust that would populate a cubic yard of wood chips. During a rare rain I spread the chainsaw shavings under an apple tree in a ten by ten foot square area, five inches deep. After sprinkling 11 pounds of Wine Cap mushroom spawn over this, I raked it deep into the chip bed and added another few inches of fresh chips. This bed I covered with a few inches of fresh hay to keep it moist. Luckily we received another quarter inch of rain that night to keep the bed watered. I'll have to water it whenever we don't get an inch of rain per week. This has been the driest spring in memory and the water table is quite low compared to other years.

I also ordered 11 pounds of Almond Agaricus mushroom spawn that grows in compost. Over a few decades we've been piling many, many wheelie bins of weeds and discarded flower trimmings in a pile that has grown four feet high and a few hundred square feet in area. Though the top is covered in vines, the rest has been reduced to fine compost that only has to be sifted through a quarter inch mesh to eliminate stones and sticks. Last fall we also collected a few cubic yards of composted horse manure form our neighbor that we also sifted and added to the "weed" compost in case it wasn't rich enough for mushrooms, since it has had Virginia creeper continuously growing on it for years. Because this mushroom variety is cold sensitive, in the greenhouse I built a 52 by 36 inch stainless steel tray (13 square feet), six inches deep, to keep it intact and free from varmints. The materials came from very old solar collector prototypes that I reworked into a rodent-proof tray.

Sheet metal tray before adding sifted compost

Five inches deep sifted mulch with holes punched at six inch spacing to receive 11 pounds of Almond Agaricus mushroom spawn
The compost had to be made very moist (so drops of water came out when squeezed in a fist). After covering the spawn with compost, I covered it with a few inches of grass mulch and sprayed water to keep it moist. I'll have to do this every day or two to help the spawn thrive. It's possible to grow a crop in this tray while the mushrooms develop and I'll probably add an array of fancy lettuce that also requires lots of water and will shade the bed.

If all goes well, in September we'll have two new kinds of mushrooms to harvest!

Sunday, September 10, 2017

Processing Tomatoes

Summer has been cool so tomatoes are ripening later than usual. We plant about 100 tomato plants so that we can process what we need in large batches. We share early and later harvests when there are fewer. This year we were running low on soup stock, tomato sauce and ketchup so tackled replenishing these.
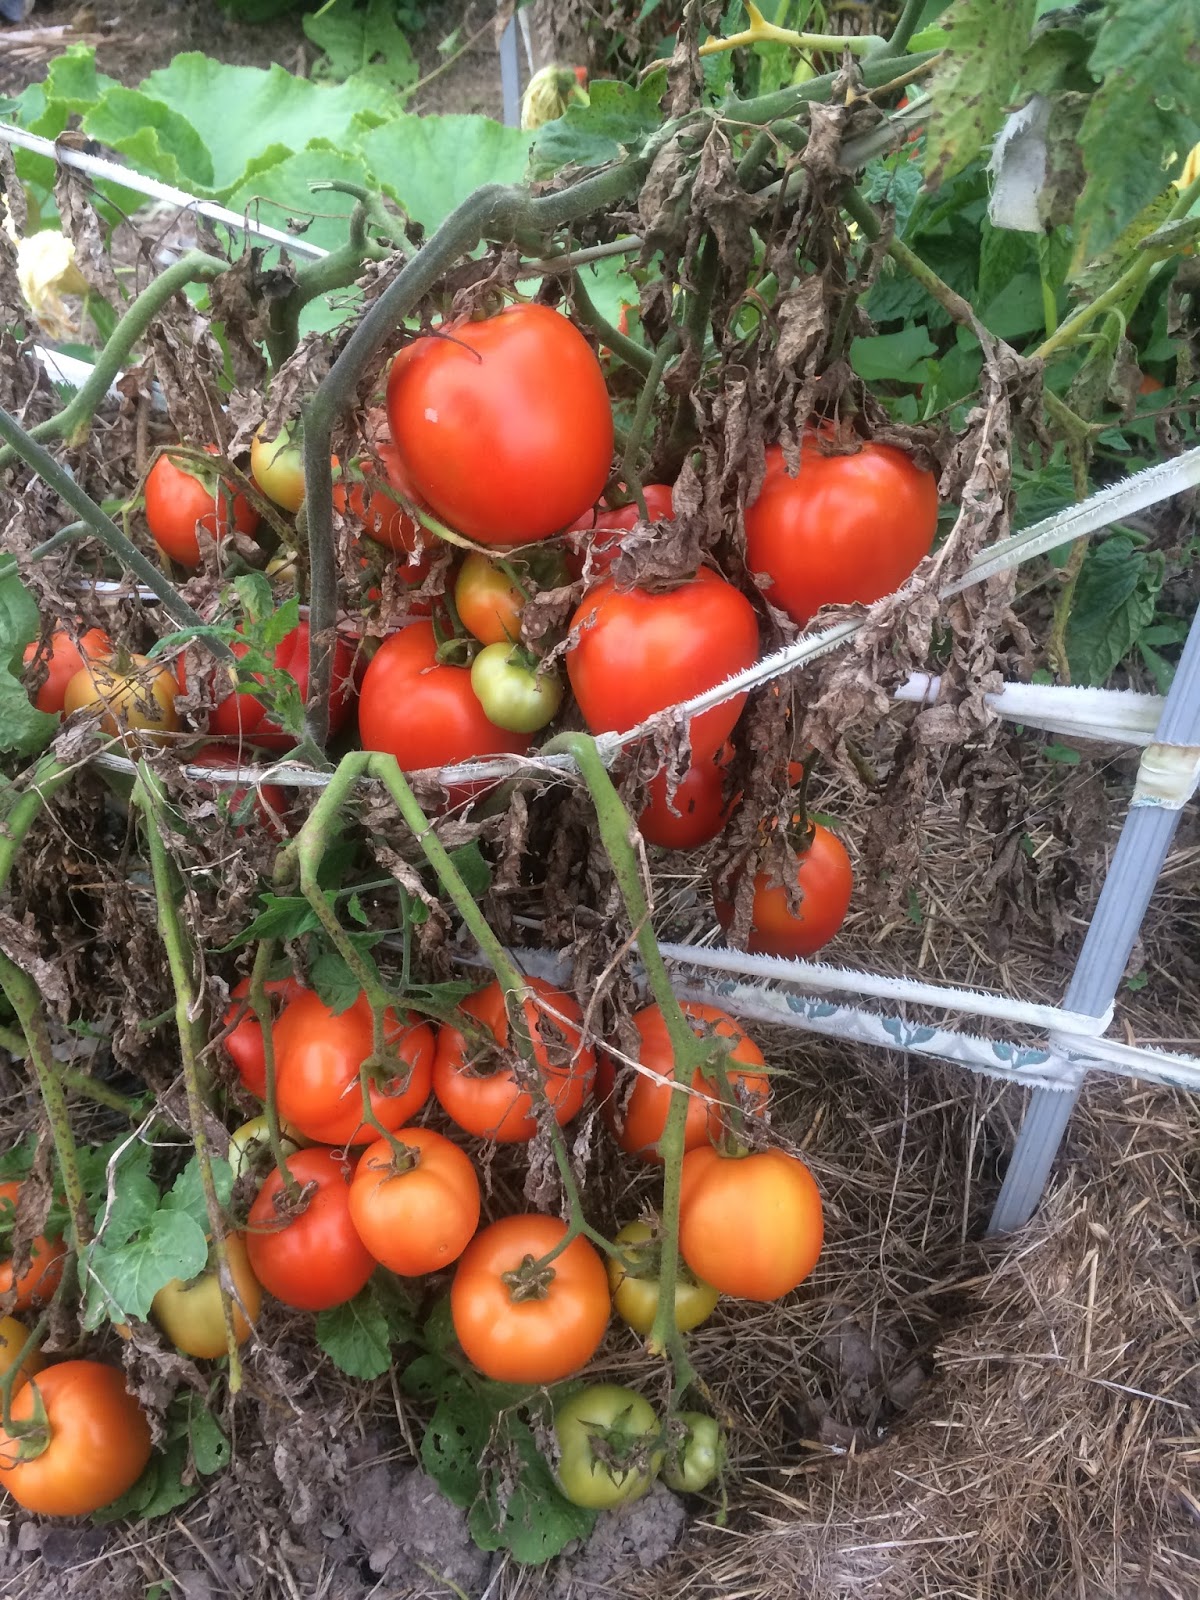
Floradade Tomatoes Ripening Nicely But Leaves Drying Up
Super Roma Tomatoes Producing Well But Leaves Also Withering
Sauce Tomatoes: 2017
We use a Squeezo food processor to separate tomato pulp from seeds and skin. It takes a whole day each to pick a few bushels of tomatoes, manually grind them through the Squeezo, decant and preserve the "tomato plasma", add spices to the sauce and ketchup and can them, clean the equipment and feed what we don't use to the Guinea fowl. This year's totals: 22 quarts of tomato sauce, 31 pints of ketchup and 65 quarts of soup stock. 

Squeezo Processor With Sliced Tomatoes Placed in Funnel, Juice and Pulp Slide Down the Chute and Seeds/skin Comes Out the End

Squeezo Closeup From a Different Angle

Bowl Full of Tomato Skins and Seeds But With Some Pulp

Second Squeezing of Above, Now Much Drier and a Third the Volume
It takes only half an hour to cook these because we separate the plasma from the pulp using a colander which we try to float in the sauce. To keep it from sinking, we bail out the clear liquid that leaks through the holes in the colander. This process does steal some of the garlic, onion and basil flavors from the sauce  but delivers them in the soup stock. We make the ketchup after separating the plasma so that soup stock is pure tomato juice.
The Colander We Found That Works Best for Bailing Soup Stock from Sauce
We use a canning technique that uses a small amount of water in a pan covered by a jar support plate with holes. When the water boils, steam envelopes the jars and exits through two small holes in the lid. We steam these acidic products for 15 minutes once steam exits the lid. 
Canning Technique Where Water Boils under the Plate that Holds the Jars and the Cover Traps Steam to Envelop the Jars.

Difference: Ladled the Left Quart While Tomato Sauce Was Boiling. Right Ladled Out of the Colander With No Boiling (Steam Bubbles Pumps Some Pulp Through the Colander Holes)  

First Batch (18 Quart Pot) of Soup Stock and Tomato Paste (5:3 Ratio)

First Batch of Soup Stock and Ketchup (12 Quarts: 12 Pints or 2:1 Because Vinegar Is Added to Make Ketchup)