For decades our 20 x 48 foot greenhouse sometimes freezes tender plants when outdoor temperatures go below zero. Inside we do have a few thousand gallons of water in tubes and tanks that heat up when the sun shines but often winter weeks go by without sunlight. In order to grow more than chard, onions and salad greens, we needed a way to add heat.

Snow also blocks sunlight from entering.
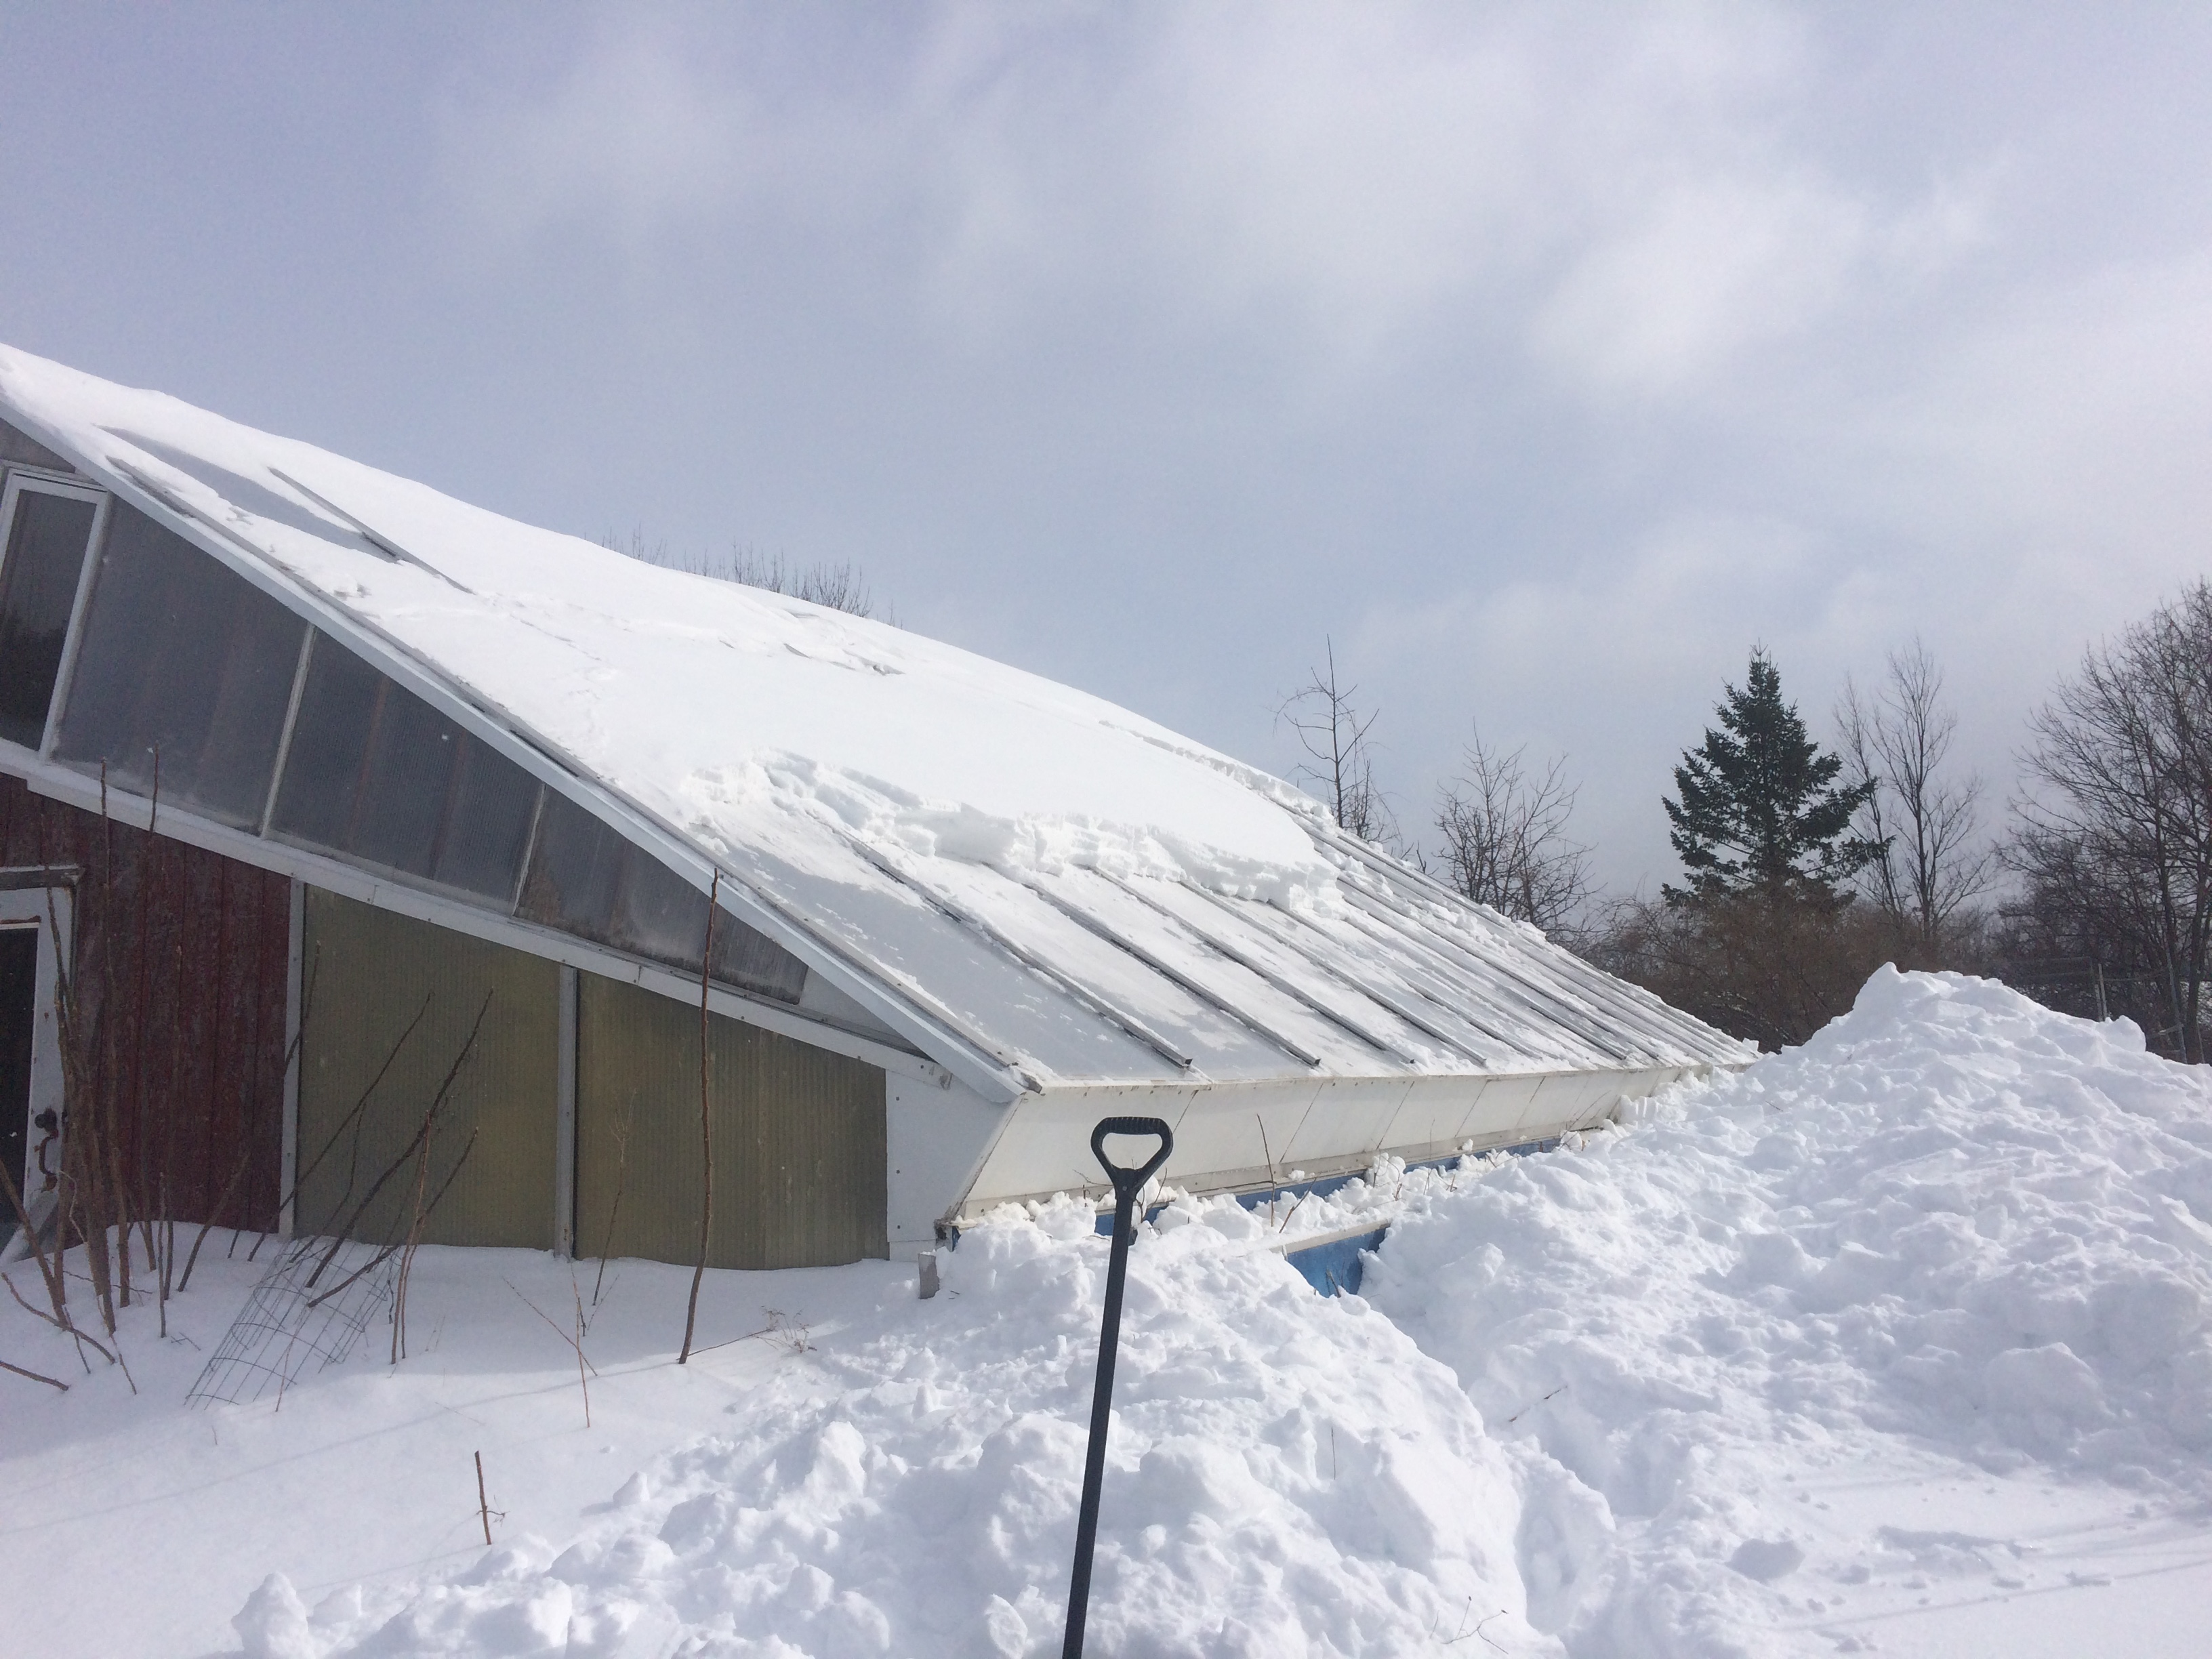
Until we remove snow and upper regions slide down.

A section of glazing showing five layers and
diagonal bracing to support snow loads.

The best reference for building rocket stoves and heaters.

The firebricks used in this project are held together with cob, a
mixture of sand and clay, instead of a high temperature cement
that cures hard. That way any rework only requires the dry glue
to be moistened and it comes apart. The ratios of sand to clay
above show that at above 5:1, the mixture, on drying, does not crack.
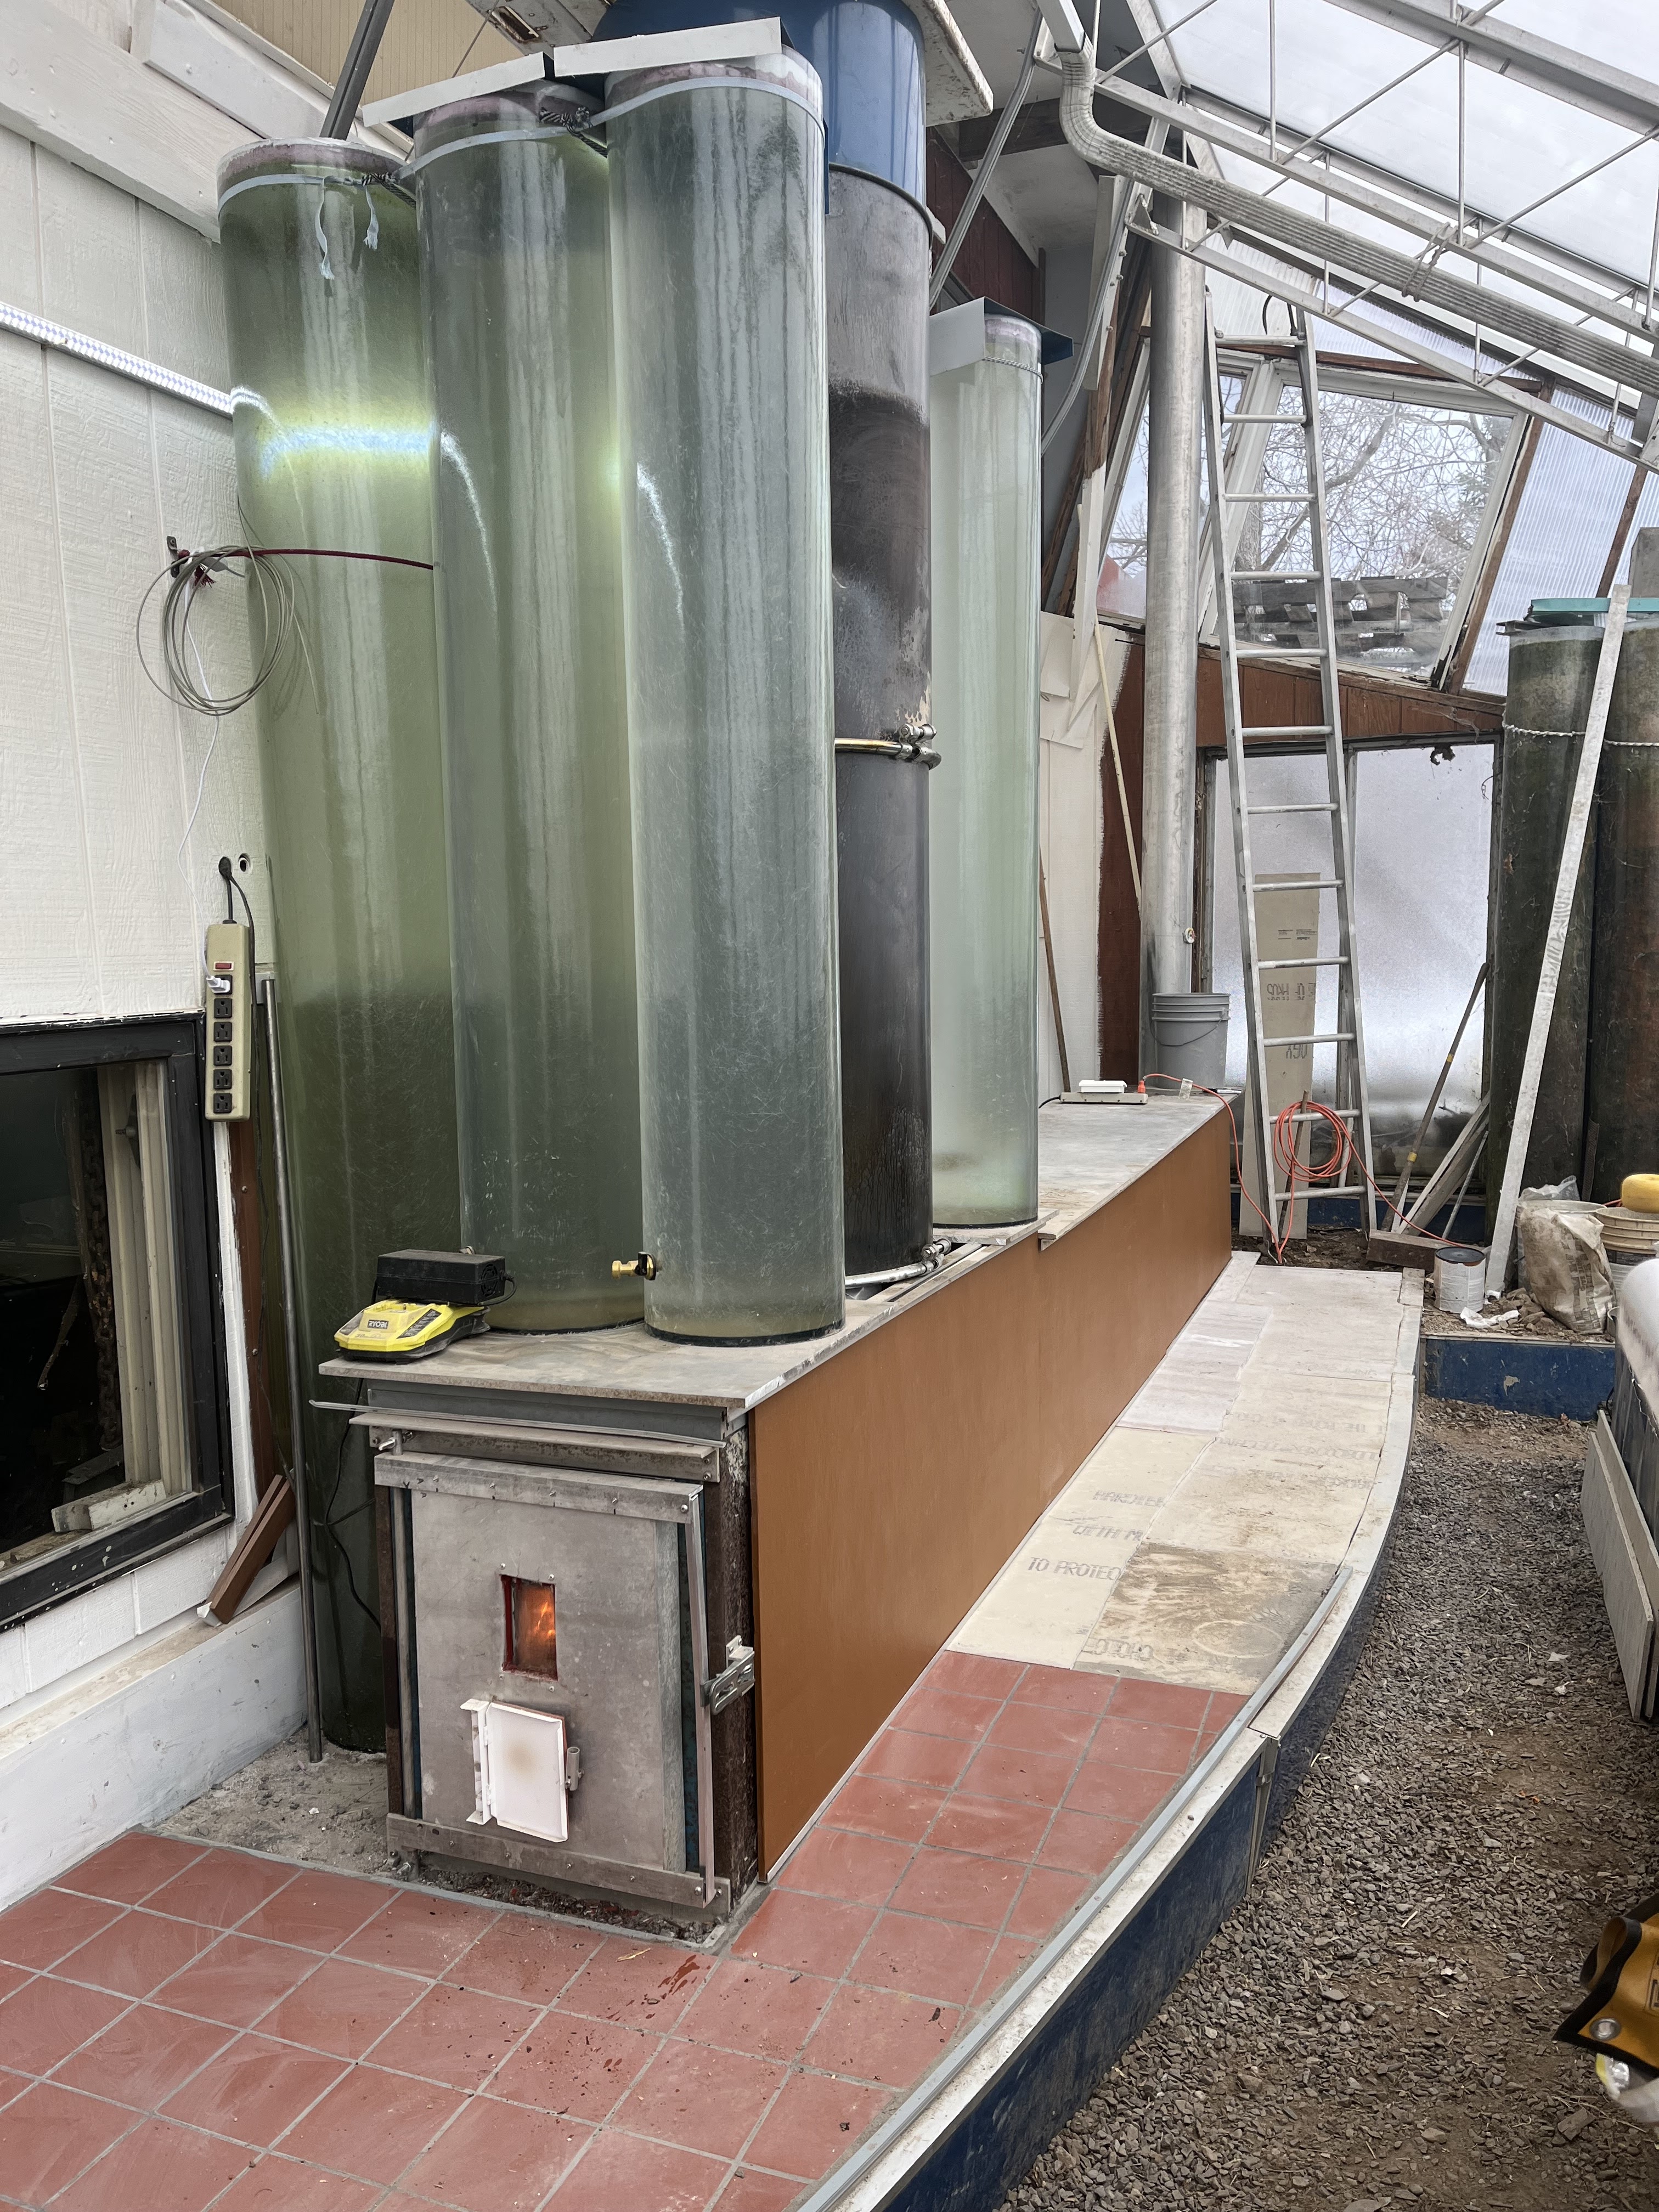
The completed heater with barrel riser surrounded by seven
water tubes, an eleven foot heated bench and exhaust stack.

Inside the two black barrels, one on top of the other, is the ceramic
fiber riser that powers complete combustion gasses of burning wood.

The disc removed from one end of the lower barrel was suspended
inside the upper barrel to prevent hottest exhaust from reaching the
top. During firing, the color change indicates the region that typically
reaches 700F charring the vegetable oil coating. The blue ring on top
hides a foot of insulation that limits heat transfer to regions above.

Paint was burned off the barrels outdoors to prevent fouling indoor air.

This view of the upside down lower barrel shows the riser hole. The more
complex outlet hole for the hot exhaust gases to exit the riser stack
and enter the horizontal tube inside the bench was made later.

This illustrates the transition from the barrel stack to the horizontal flue
run inside the bench with this cob (mixture of clay, sand, silt and stones)
also in good contact with the adjacent water tubes.

This view shows the bench with water tubes behind before two additional
water tubes were added on each side of the barrel stack. Cement tile
backer board contributes and hides thermal mass.

The bench frame consists of two instrumentation racks lying on
their back, end to end. An 8 inch steel flue runs the length inside
and was covered by a foot of clay/sand/stone slurry that has now
dried in good contact with the flue. The volume above now stores
more than a ton of surplus bricks to maximize storing heat during
firings. These are still readily available for future projects.

Another view of the bench with its sheet aluminum top
left over from building large solar collectors.

This shows burning off the paint on one of two boxes with doors that
make it easy to inspect the transition between the riser/barrels and
horizontal flue and between the latter and the vertical stack.

This shows the detail of the bottom of the burn chamber with
two stainless steel pipes that introduce fresh air to the base of the
riser to enable complete combustion of exhaust. Under these is
space for a stainless steel tray that catches ash and makes
them easy to remove.

This view shows the ash section of the wood stove that is the sole
source of heat in our home. Many years ago I replaced its cast iron
grate that burned through with stainless steel pipes and they've
performed wonderfully. The ash bin below also works very well,
requiring us to empty it only once per week.

Illustrates the first row of wall fire bricks and include those
that define the port width. Forcing the exhaust through a
narrow channel creates two vortices just above the far end of the
secondary air pipes and creates the "roar" as it travels up the
riser, making the noise that gives "rocket" heaters their name.

Firebox and riser base now complete and also showing the open
box door of the barrel/horizontal transition through which any ash
buildup can be removed.

Firebox now with a calcium silicate fiber roof, one inch of
ceramic fiber insulation and sheet aluminum to limit
infiltration. The ash tray is also in place.

Four each four inch high calcium silicate rings were stacked on
top of the firebrick riser base before insulating the assembly with
ceramic wool batting. The barrel clamp ring fastens the lower barrel
to its lid that has a hole for the riser and flue exit.

This shows the one meter tall ceramic fiberboard riser portion.

The open area of the hexagonal riser and other items that carry
exhaust gasses are larger or the same as an eight inch circle
to prevent restricting flow.

The hexagonal riser now covered by two inches of ceramic fiber
blanket, a sheet of aluminum and also showing the barrel lid
with the flue gas exit transition hole. Two vertical steel
angles were added to insure the riser inside stays put.

The door assembly includes a ceramic glass window and an air
inlet door that admits the proper amount of primary and secondary
oxygen for optimal combustion. The latter is opened only during the
hour or two per day that there is need for additional heat. If the
sun comes out for even a few hours, typically no additional heat
is needed even when nighttime temperatures approach zero.
Xena, our greenhouse cat, supervised everything!

Moisture in burning wood exits as steam when it's freezing.

When it's above freezing, there is no visible exhaust. The rocket mass
heater did keep the greenhouse above freezing during a -20 F very windy
period but it did require the fire burn for quite a few hours. Even with
nights in the teens, this week in February we haven't needed fires because
of sunny days! When the fire is out, I now block the bottom of the 18 foot
tall stack to prevent the very buoyant warm gasses inside from sucking
heat out of the thermal mass (the vacuum is strong enough to hold up
a thin aluminum sheet). This draw does make starting fires very easy
since it takes less than a minute to ignite a wad of newsprint
that is placed under a few twigs to make the burner roar!

The little flap on the heater door now has its white paint burned off
where it covers the round air intake hole. I only open it a half inch
during burns to limit the rate. The broken tiles on the bench behind
are some of 74/88 that arrived broken. They are sending replacements
so I can finish tiling the heater apron. The low profile ash bin is a bit
small and has to be emptied every three or four burning days.