Showing posts with label woodworking. Show all posts

Monday, December 31, 2018

2018: An Interesting Year

This post rambles through topics that don't warrant dedicated blog entries. Many subjects like sprouting seed, growing them to transplant size in the greenhouse, then planting in outdoor gardens have been covered earlier and methods haven't evolved much. Tomatoes this year were outstanding, though the rows proved too close together (36 inches) and hard to get through later in the season. Next year we'll try four foot spacing between rows.
Clacker Toys for Toddlers
The Showcase Entry Clacker Toy
I often spend time in winter working on wood projects to get ready for the spring Northeast Woodworkers Showcase where our organization displays articles made during the year. I entered one of four "clacker" toys that make a lot of noise when rolled across the floor. It only won second place in the toy category because someone created a perfect scale model of a bulldozer in which everything worked! Each of the hundreds of treads actually move when pushed along, an incredible amount of beautiful craftsmanship. 


Bulldozer that Won a Blue Ribbon
 Every winter two nieces and their parents visit us on their way back from a week skiing. They usually want to work on a project and this time chose to help make two animal figures: a cheetah and a French Bulldog. These are mounted on pedestals with springs hidden inside so strings attached enable each to wag a tail, bow, lie down or assume other motions. I sent them home unpainted, hoping their owners would make them look like the animals they chose.
Cheetah and French Bulldog Toy Action Figures
 Every spring we shave most of the hair off our dog to make her more comfortable (she withers in heat). She loves looking like a lion, or at least, being much cooler (and rolling in cool grass).
Belle in Her Lion Cut
Fully Developed Monarch Caterpillar
Newly Emerged Monarch Butterfly
 We love butterflies and I've been collecting and identifying them my whole life. Monarchs are our favorites because they are large, beautiful and migrate such long distances. Last year I saw only three. This year was different: we saw many all summer, including their caterpillars on milkweed. After monitoring many caterpillars that did not survive to make chrysalises, we collected new ones and placed them in a large jar with sprigs of milkweed. We successfully raised nine through their becoming butterflies! And we let them go: hopefully to fly to Mexico where they overwinter. 
Some of Many Millions of Monarch Butterflies Overwintering in Mexico, 2018-19
Our daughter, Zoe, is in Mexico as I write this, and just sent me the photo above. She went there specifically to see these butterflies and was encouraged that guides at the site noted that there are more this year than many prior years. Ever more folk are conserving patches of milkweed that promote these butterflies in their migration north.
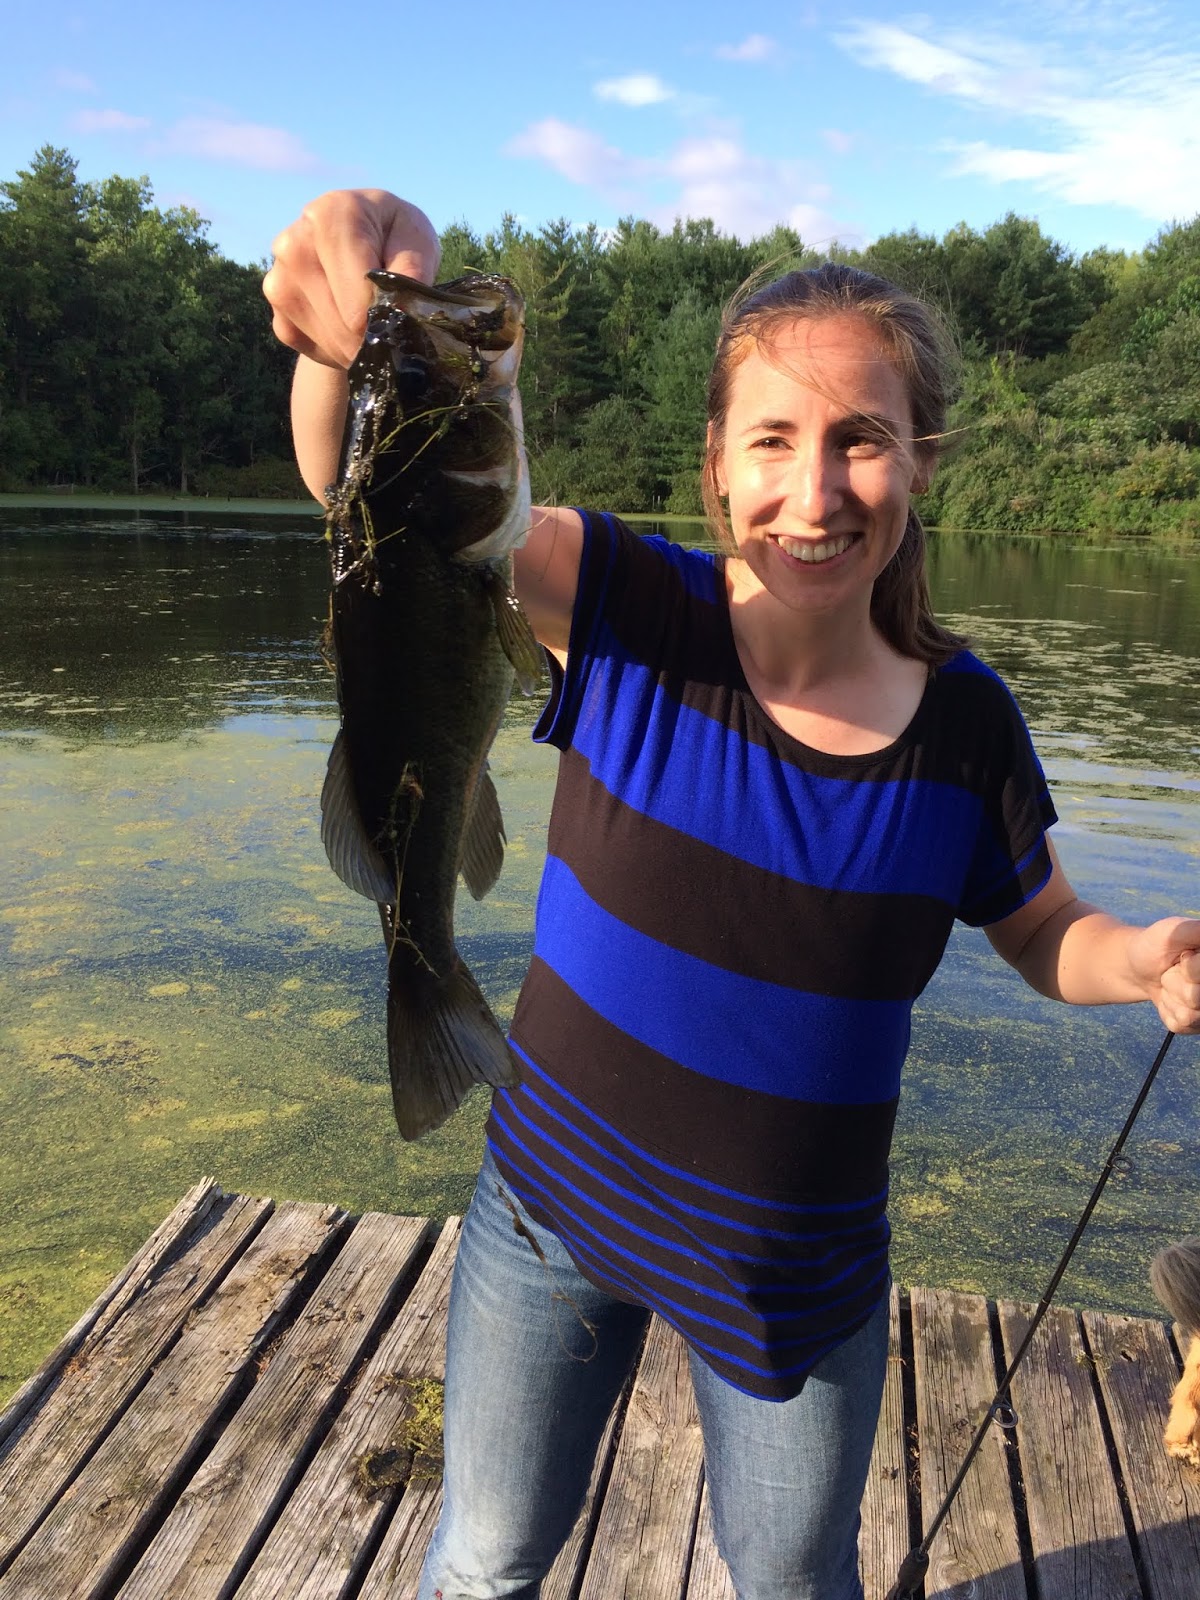
Zoe with Her Catfish
We have a farm pond that we stocked with fish many years ago. The species that flourish are crappie, bass and channel catfish, though sunfish and bullheads also thrive. Our daughter, Zoe, wanted to catch one of the large catfish for a long time and finally she caught one, and we ate it. The downside was that this lady was full of roe, even though it was September. We had no idea fish could be laden with eggs at this time of year. As with all of the animal parts we don't serve as dinner, we pressure cook them and grind them into paste for our animals so none goes to waste.

 Our Guinea fowl have always been problematic: they like to lay their eggs in hidden thickets around the property instead of in the egg boxes we carefully prepare for chickens. This year we had three females establish nests in remote hedges and luckily we found each one. Two of the three fowl did not survive incubating their nest overnight, one disappeared leaving only feathers and the other we found lifeless but in perfect condition a few hundred feet from her nest but her eggs had been eaten. The male and those females that were not laying eggs roosted in their protected enclosure indoors every night that had safe nesting boxes but these ladies refused to use them. We did routinely snitch eggs from their nests, hoping that they would not start incubating their eggs until they had around 30 (a persistent rumor). Eventually each started sitting overnight even though they had fewer than 20 eggs. We placed some of their eggs under two broody hens (chickens) and five hatched, with four now almost grown up (thinking they are chickens).
One of the Guinea Fowl Nests
A Second Guinea Fowl Nest
Shiitake Mushroom Harvest
Some of the Chestnuts We harvested
One Batch of Onions Packed for the Shelter We Supply
One Picking of Ripening Peppers
Except for our Brussel sprouts, our gardens produces plenty of food for us, friends and the shelter we supply. We planted many types of squash and they did very well, hundreds of pounds more than in other years.
Some of the Winter Squash Maturing 
Another View of Winter Squash Drying on Tables So that Rodents Don't Nibble Them Before They Get Distributed


Wednesday, January 18, 2017

Making Harvest Baskets

We gather a lot of vegetables and flowers. For major harvests we use a wheelbarrow or cart. But most summer days we pick smaller amounts, enough for a meal or two, berries for jam and baking, or flowers for tables and windowsills. Our primary basket was a wedding present we have been using for over three decades. My wife likes to use it for carrying her cut flowers and that often interfered with my collecting veggies for dinner. 
Woven Harvest Basket, 35+ Years Old
It became obvious that we needed more than one harvest basket (that we call a trug). My wife presented me with one that works okay, but is too small, and, like her basket, has a handle that often deflects thrown peas and beans so that they miss the basket. Both handles also get in the way when grabbing peas or beans between hands when they are on opposite sides. My first trug raised the handle pretty high, attempting to make it easier to fill and empty. This design was heavy and the handle still got in the way. Permanently erect handles also makes baskets bulky to store. Empty, they take up a lot of space.
Commercial Harvest Basket: Coated Steel Wire Mesh
My First Trug: Too Heavy, But Won a Prize
An ideal baskets should have handles that swing out of the way. When you have more than one, they should also stack, one inside another. They should be light enabling heavier payloads. My next one incorporated a handle that could swing to the side for filling, emptying and storing. It also used only a frame of wood and very lightweight rawhide for lacing.

Trug with Handle Swung to the Side
Trug with Handle Erect

Three Trugs Together Showing Relative Size
Trugs Fills With Produce
 The rawhide I used for the swing-handled trug came from a deer I harvested with a bow and arrow when I was still in high school. With only a limited supply of rawhide, I used one-inch wide webbing for the next pair of trugs that I made for four-year old twins. These work great and though they are a bit large for them now, they'll grow into them and should last their lifetime. To make them waterproof so that veggies can be washed in the trugs, both the rawhide trug and those made with webbing were given many coats of marine varnish that also melds the webbing to the wood frame.

Twin Trugs with Handles Swung to the Side

Stacked Trugs


Monday, January 16, 2017

Scroll Saw Bowls with Segmented Feature Ring

A year ago my wife gave me an interesting book on how to make bowls without a lathe. At that time I did not have a wood lathe and the prospect of making bowls without creating mounds of wood shavings intrigued me.
Carole Rothman Uses a Scroll Saw to Make Her Bowls 

Carole Rothman has developed techniques that transform flat boards as wide and long as the dimensions of the piece into incredibly beautiful bowls. One drawback: these bowls typically have sides that are around 45 degrees. 

I like to make things that are useful and have been planning to make a series of sturdy bowls for chopping vegetables and nuts so that the process doesn't send pieces all over the place. My wife's mother had a very functional wooden bowl and chopping knife that she used many decades.  The bowl was shallower than the one pictured above so, in order to use a scroll saw, I had to modify the technique. 
Mother-in-Law's 12.5 Inch Diameter Bowl and Chopping Knife
My first attempt used two boards of hard maple to make the bottom four layers of a bowl. Turning a solid piece of wood involves slicing through the grain at various angles. It is much easier to cut "with the grain" than "across the grain". The woodworking group I belong to introduced me to segmented bowl techniques and the advantages of creating layers that have no "end grain". For the fancy top layers, I added feature rings of trapezoids.
First Chopping Bowl with Cherry Feature Ring on Top of Four Layers of Maple
Side View of First Bowl


Two Handled Chopping Knife, Handles Cover Blade When Not in Use
Second Bowl with Cherry Feature Ring and Pine Separators
Top View: Second Bowl Showing Trapezoids and Separators
Second Bowl Complete

Discs on Left Have Been Cut Out of a Square Board at 45 Degrees. They Will Be Cut Again to Make Layers #2 and #4 of Two Bowls.  Stacked Discs on Right Are Layers #1 and #3 of Those Bowls.
The Four Bottom Layers of a Bowl

Glued Up Stack of Four Layers of Yellow Birch

Feature Ring: Alternating Trapezoids of Walnut and Cherry

Feature Ring Added to Four Layers of Yellow Birch
Chopping Knife with Leather Cover


Bottom View of Chopping Bowl #3

Top View of #3

Top View of #4: Yellow Birch Layers 1-4, Alternating Trapezoids of Cherry and Oak, with Purple Heart Separators

Bottom View of Chopping Bowl #4


Wednesday, August 17, 2016

Turning Segmented Wood: Making Beads-of-Courage Vessels

Every year the Beads-of-Courage (http://www.beadsofcourage.org/) program provides 60,000 sick children in 250 hospitals beads for every procedure they have to endure. They start out stringing these beads together but too often they have so many that they need a container to hold them all. The organization asks woodworkers create fancy boxes to hold beads. In March I made a vessel using flat boards
My First Beads of Courage Vessel With Rings Made Out of Two Flat Boards
I recently joined a group of woodworkers learning to make round objects using segments. The technique uses triangles or trapezoids glued together to form rings that are stacked to make bowls, vases, urns and similar cylindrical forms. By incorporating different colors of wood, these creations can be extraordinary. The pieces of wood are typically arranged so that grain is tangent to the circumference of these round forms. Tools then shave nice ribbons when slicing along the grain. When making a ring from a solid board, only two small parts cut along the grain the rest becomes more difficult as more and more wood fibers have to be cut at up to 90 degrees. Cutting tools often pull bits of fiber out of the wood that require more sandpaper and effort to finish.

Three additional vessels use twelve trapezoids that have 15 degree angles on each end to create five or six rings. The upper and lower rings of the cylinder are walnut and the three layers that make up the top alternate cherry, walnut and soft maple. The sides of the vessels utilize either soft maple or birch dowels, lined with clear formed polycarbonate sheet. Knobs (actually rejected wine stopper handles) were turned from lilac. In contrast to the first vessel that used two pieces of wood, the solid cylinders use 74 pieces, not counting knobs.
Views: Inside Lids and Solid Cylinder Bottoms
Views: Inside Vessels and Tops 
Stepped and Blended Three Ring Tops on Vessels
Three Rings Glued Together Make the Tops
The Vessel With Clear Sides Supported by Six Dowels
View Showing Inside the Lid and Open Vessel
View Showing Maple Bottom and Inside Lid with Pine Ring That
Centers the Lid on the Vessel Opening