Thursday, January 11, 2024

Processing Garlic

Our 2023 garlic crop started by planting 1,100 cloves in early October, 2022. 

They emerged from the ground by November and weathered through the winter snow. 
After removing the garlic scapes during May and June, harvesting began the first week of July.
A strip down the middle of the patch was harvested first to make room for a row of Delicata squash.
The rest of the garlic were dug and hung to dry in bunches of 25 inside the garage. Total weight of peeled garlic: around 100 pounds. Every week through November I delivered two pounds of peeled garlic to cooks at a local homeless shelter. In October I processed around ten pounds into powder and granules. And yesterday I began processing more.
To preserve garlic, we grind it in a food processor, dehydrate it and grind it again into powder and granules.
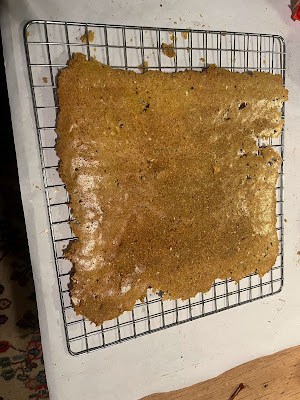
10.75 pounds of garlic mash was spread on 10 teflon sheets and dried for around ten hours at 135 degrees.
Teflon sheets were then peeled off and the now rigid garlic shingles were dried another seven hours to remove moisture trapped against the film.
The 4.85 pounds of garlic crackers were again ground in the food processor, having lost 55% in dehydration.
The teflon sheets were also dried overnight so stuck on bits of garlic could be scraped off.
After grinding, garlic powder was separated from granules by shaking in a strainer which was then dumped into a colander. Larger bits were then dumped back into the food processor.
The desired result was roughly equal amounts of garlic powder and granules. To change the ratio: simply alter the time larger pieces spend in the processor.
Dry garlic stores great in jars: the powder we use in sauces and marinades, granules we add in recipes that get cooked which softens them. It's way quicker and easier to add dried garlic than processing fresh garlic when cooking!


Monday, February 13, 2023

Batch Rocket Mass Heater for Greenhouse

For decades our 20 x 48 foot greenhouse sometimes freezes tender plants when outdoor temperatures go below zero. Inside we do have a few thousand gallons of water in tubes and tanks that heat up when the sun shines but often winter weeks go by without sunlight. In order to grow more than chard, onions and salad greens, we needed a way to add heat. 
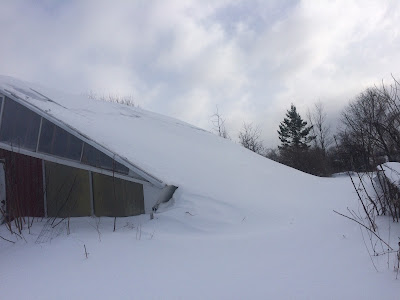
Snow also blocks sunlight from entering.

Until we remove snow and upper regions slide down.

A section of glazing showing five layers and 
diagonal bracing to support snow loads.

The best reference for building rocket stoves and heaters.

The firebricks used in this project are held together with cob, a 
mixture of sand and clay, instead of a high temperature cement 
that cures hard. That way any rework only requires the dry glue 
to be moistened and it comes apart. The ratios of sand to clay 
above show that at above 5:1, the mixture, on drying, does not crack.

The completed heater with barrel riser surrounded by seven 
water tubes, an eleven foot heated bench and exhaust stack.

Inside the two black barrels, one on top of the other, is the ceramic
 fiber riser that powers complete combustion gasses of burning wood. 

The disc removed from one end of the lower barrel was suspended 
inside the upper barrel to prevent hottest exhaust from reaching the 
top. During firing, the color change indicates the region that typically 
reaches 700F charring the vegetable oil coating. The blue ring on top
 hides a foot of insulation that limits heat transfer to regions above.

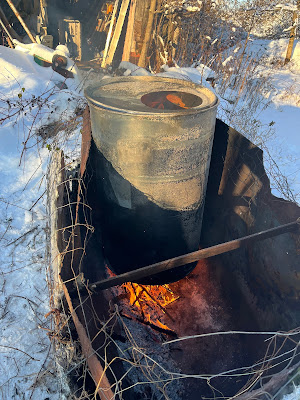
Paint was burned off the barrels outdoors to prevent fouling indoor air.

This view of the upside down lower barrel shows the riser hole.  The more 
complex outlet hole for the hot exhaust gases to exit the riser stack 
and enter the horizontal tube inside the bench was made later. 

This illustrates the transition from the  barrel stack to the horizontal flue 
run inside the bench with this cob (mixture of clay, sand, silt and stones) 
also in good contact with the adjacent water tubes.

This view shows the bench with water tubes behind before two additional 
water tubes were added on each side of the barrel stack. Cement tile 
backer board contributes and hides thermal mass.

The bench frame consists of two instrumentation racks lying on 
their back, end to end. An 8 inch steel flue runs the length inside 
and was covered by a foot of clay/sand/stone slurry that has now 
dried in good contact with the flue. The volume above now stores 
more than a ton of  surplus bricks to maximize storing heat during 
firings. These are still readily available for future projects.

Another view of the bench with its sheet aluminum top 
left over from building large solar collectors.

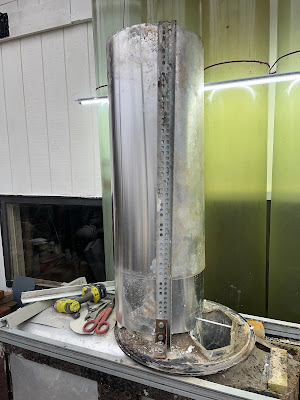
This shows burning off the paint on one of two boxes with doors that 
make it easy to inspect the transition between the riser/barrels and 
horizontal flue and between the latter and the vertical stack.

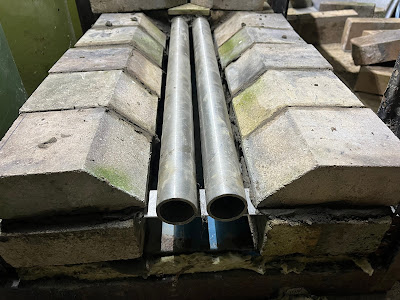
This shows the detail of the bottom of the burn chamber with 
two stainless steel pipes that introduce fresh air to the base of the 
riser to enable complete combustion of exhaust. Under these is 
space for a stainless steel tray that catches ash and makes 
them easy to remove.

This view shows the ash section of the wood stove that is the sole 
source of heat in our home. Many years ago I replaced its cast iron 
grate that burned through with stainless steel pipes and they've 
performed wonderfully. The ash bin below also works very well, 
requiring us to empty it only once per week. 

Illustrates the first row of wall fire bricks and include those 
that define the port width. Forcing the exhaust through a 
narrow channel creates two vortices just above the far end of the 
secondary air pipes and creates the "roar" as it travels up the 
riser, making the noise that gives "rocket" heaters their name.

Firebox and riser base now complete and also showing the open 
box door of the barrel/horizontal transition through which any ash 
buildup can be removed.

Firebox now with a calcium silicate fiber roof, one inch of 
ceramic fiber insulation and sheet aluminum to limit 
infiltration. The ash tray is also in place.

Four each four inch high calcium silicate rings were stacked on 
top of the firebrick riser base before insulating the assembly with 
ceramic wool batting. The barrel clamp ring fastens the lower barrel 
to its lid that has a hole for the riser and flue exit.

This shows the one meter tall ceramic fiberboard riser portion.

The open area of the hexagonal riser and other items that carry 
exhaust gasses are larger or the same as an eight inch circle
 to prevent restricting flow.

The hexagonal riser now covered by two inches of ceramic fiber 
blanket, a sheet of aluminum and also showing the barrel lid 
with the flue gas exit transition hole. Two vertical steel 
angles were added to insure the riser inside stays put.

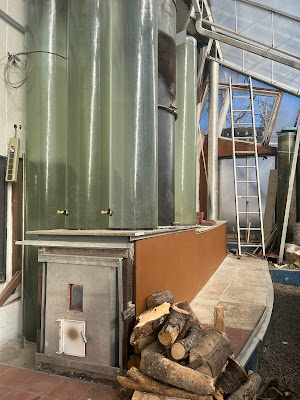
The door assembly includes a ceramic glass window and an air 
inlet door that admits the proper amount of primary and secondary
 oxygen for optimal combustion. The latter is opened only during the 
hour or two per day that there is need for additional heat. If the 
sun comes out for even a few hours, typically no additional heat 
is needed even when nighttime temperatures approach zero. 
Xena, our greenhouse cat, supervised everything!

Moisture in burning wood exits as steam when it's freezing.

When it's above freezing, there is no visible exhaust. The rocket mass 
heater did keep the greenhouse above freezing during a -20 F very windy
 period but it did require the fire burn for quite a few hours. Even with 
nights in the teens, this week in February we haven't needed fires because 
of sunny days! When the fire is out, I now block the bottom of the 18 foot 
tall stack to prevent the very buoyant warm gasses inside from sucking 
heat out of the thermal mass (the vacuum is strong enough to hold up 
a thin aluminum sheet). This draw does make starting fires very easy 
since it takes less than a minute to ignite a wad of newsprint
that is placed under a few twigs to make the burner roar!

The little flap on the heater door now has its white paint burned off 
where it covers the round air intake hole. I only open it a half inch 
during burns to limit the rate. The broken tiles on the bench behind 
are some of 74/88 that arrived broken. They are sending replacements 
so I can finish tiling the heater apron. The low profile ash bin is a bit 
small and has to be emptied every three or four burning days. 


Sunday, March 20, 2022

A Skin-on-Frame Adirondack Guide Boat

 Cape Falcon Kayak described making Adirondack guide boats and reminded me of time I spent in the Adirondacks, hiking as a teenager and later canoeing there through a chain of lakes.

Skin-on-frame guide boats made by 
Brian Schulz at Cape Falcon Kayak

Before roads, wood planked versions of these boats were "pickup trucks" of the Adirondack region.

Fifty years ago I paddled a robust aluminum canoe many miles in both New York state and British Columbia, Canada. Though rugged and functional, this kind of canoe is awkward, loud and heavy. Searching for a lighter, quieter craft and that I could make myself, skin-on-frame canoes stood out. But rowing is more efficient and promotes fishing. Guide boats are essentially canoes that you row (or paddle). 

Building one involves making a bottom board, two stems and two gunwales with ribs between them to establish shape. Stringers on each side then support the nylon fabric stretched over the frame that is then coated to make the boat float. Tiny decks are added to the bow and stern for hand holds or for sitting on when launching and landing. Installing seats and making oars complete construction.
Dimensions in this 14 foot boat scaled the 16 foot 
data published in The Adirondack Guide-Boat 
by Kenneth and Helen Durant.

 Discarded redwood paneling (3/4x8 inches x 8 feet), 
painted white on one side provided the wood for 
the bottom, stems, ribs, gunwales, stringers and 
decksRedwood is lightweight, rot resistant but 
not able to take very high forces.

A dead ash tree milled by volunteers from the Northeast 
Woodworkers Association provided wood for 
the seat frames and other high stress parts.

Joining then milling to half inch thickness, two 
redwood boards scarfed together make the 
bottom. Perpendicular grooves establish the 
27 rib locations.   

Plastic templates were made for the stem, above, 
and the ribs, then reproduced in redwood.

Eight thin slices of redwood were laminated 
together to make a double rib, that was split 
in half to make front and rear ribs.

There are ten different rib patterns. 

Each 3/4 inch wide rib was split in two to 
populate front and back halves of the boat.

The central nine ribs are identical: from five double 
ribs cut in half. To prevent the ribs from delaminating
 when bumping into rocks, they were wrapped with 
50 pound braided fishing line and then varnished.

Too thin for screws, lashing and adhesive 
connect ribs to the bottom board. 

`
Most of the ribs in place.

Three sets of two eight foot boards were scarfed together 
to make gunwales, the long pieces that top the ribs and 
establish the shape. This process also made an extra set 
for another boat (to insure the assembly stays straight).

The fourteen foot gunwales needed a six inch 
chord to establish the proper curve.

Waiting for the glue to cure.

The actual chord dimension and also showing 
the three layers that make up the gunwales.

Length of three laminated boards, good for four gunwales.

Lashing a gunwale to ribs.

Both gunwales in place. Extra lengths 
of ribs were trimmed off.

Stringers that support the fabric were scarfed, glued, 
sanded and varnished before lashing them to the ribs 
evenly spaced between the gunwales and bottom board.

Showing a stringer connection to a stem, 
the curved boards at each end of the boat.

The completed frame.

To this point, work was done with the frame upright. 
In order to attach the skin, the frame needed 
to be upside down.

Nylon fabric was stretched both end to end and gunwale
 to gunwale.The 14 foot long edges were first stapled 
on each side, then sandwiched between redwood 
gunwale and an added ash outwale (for strength 
for bumping docks and to support oarlocks).

Hand stitching each end a bit to the side insured 
that the hem didn't interfere with the brass 
rub strip added after coating the fabric.

The wrinkly fabric was then soaked with hot water 
and drying stretched out the wrinkles.

A dark color acid dye was applied to make 
the boat a more appropriate color but it 
left splotches and streaks.

A different dark dye was mixed with four coats 
of two part polyurethane resin to hide stains 
of the previous effort.

At this point the boat weighs 34 pounds! 
Adding decks, oarlocks, brass rub strips
 and seats added six pounds.

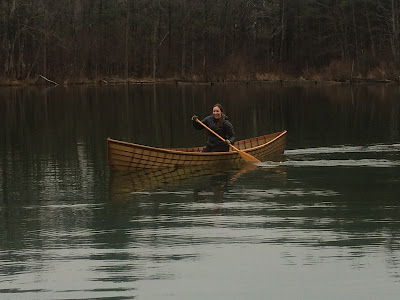
On the day before our pond froze in December, 
we made sure the boat didn't leak!

But we had to paddle because there were 
no seats, oarlocks or oars yet!


Durants' book above has plans for each 
seat that include holes for caning.

Seat frames were made out of ash but without caning holes.

Woven continuous strips of wet rawhide 
populate frames instead of caning.

It takes only an hour to cut rawhide into 
strips, soak one and then weave it around 
each seat frame.

There are identical decks at each end that provide 
handholds to pick up and carry the boat.

Deck support structures are made from ash to 
withstand the forces involved in sitting 
on a deck or carrying a loaded boat.

Redwood planks finish the decks. This photo also shows an end 
of the brass rub strip that runs from around the bow stem, 
along the ash keel on the bottom and around the stern stem.

Outwales are trapezoidal in section so that oarlocks rotate 
perpendicular to the water. Since screws in the redwood
 gunwales to attach oarlocks would probably work loose
 over time, I used bolts with a backing plate against
 an ash wedge to present a parallel face.

The first set of oars were made 
from a dead white pine tree.

Oar shape and dimensions were from Durants' book.

A second oar copied the first.

Now complete with three seats mounted, 
two oars and two sets of oarlocks.

I plan to make a second guide boat that should be easier and take much less time (and I already have the gunwales!). It will have half the number of ribs, keeping them 3/4 of an inch wide so screws through the gunwales, stringers and bottom board will hold well. Rib and stem laminations will include ash to make them stronger without having to wrap them with fishing line. Nylon fabric will be extra heavy to make it more rugged. Stringers will be larger to better support the fabric between ribs that will be twice the distance apart. Weight will probably be under 50 pounds.